

Written by malessandroni

We are going to see how to create an Apache Syncope 2.X instance that will simply pull a list of users from an external resource and propagate them to a second one.
Let's start by creating a Sycope 2.0.4 instance from Maven archetype:
mvn archetype:generate \
-DarchetypeGroupId=org.apache.syncope \
-DarchetypeArtifactId=syncope-archetype \
-DarchetypeRepository=http://repo1.maven.org/maven2 \
-DarchetypeVersion=2.0.4
By default, the embedded mode is populated with example data, so you should remove that first:
cd syncope-archetype
cp core/src/main/resources/domains/MasterContent.xml core/src/test/resources/domains/MasterContent.xml
From the project main directory:
mvn -P all clean install
cd enduser
mvn -P embedded,all
Open http://localhost:9080/syncope-console and you'll find the Syncope Admin Console.
Enter your MySQL server and run the following commands:
CREATE DATABASE IF NOT EXISTS syncope;
USE syncope;
CREATE TABLE users (email VARCHAR(100), username VARCHAR(150) NOT NULL, password VARCHAR(80), surname VARCHAR(150), firstname VARCHAR(150), PRIMARY KEY (username));
INSERT INTO users VALUES ("user1@gmail.com", "user1", "password", "Kant", "Jack");
INSERT INTO users VALUES ("user2@gmail.com", "user2", "password", "Red", "Frank");
Enter your MySQL server and run the following commands:
CREATE DATABASE IF NOT EXISTS syncope_backup;
USE syncope_backup;
CREATE TABLE users (email VARCHAR(100), username VARCHAR(150) NOT NULL, password VARCHAR(80), fullname VARCHAR(300), PRIMARY KEY (username));
First, it is important to follow the instructions from the official Reference Guide in order to configure the bundles directory to have all necessary connector JAR files.
Then you just need to add the MySQL connector dependency to the "core/pom.xml" project file:
<dependency>
 <groupId>mysql</groupId>
 <artifactId>mysql-connector-java</artifactId>
 <version>5.1.42</version>
</dependency>
Now you need to rebuild the application.
Login to Admin Console, go to Topology and add a new connector by clicking on the node where you recognize the path of you project:

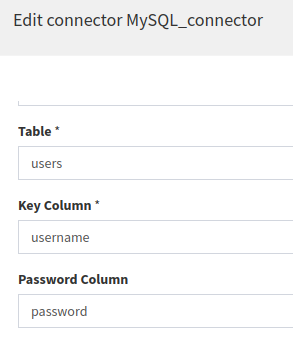
Edit the connector as below:


you should also add some Capabilities:

Create a second similar connector with a different name (for the other database you have created above "syncope_backup").
Click on each connector and proceed to create a 2 resources by clicking "Add new resource" from menu.
At the end you should have 2 resources like these:

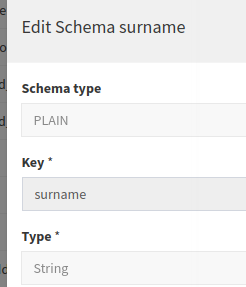
Go to Configuration -> Types -> Schemas and add the following info:


Now you need to link the new Schemas to a specific AnyTypeClass so go to Configuration -> Types -> AnyTypeClasses and edit BaseUser:

Go back to "Topology" section, select MySQL1, click on "Edit provision rules" and finally the "+" button:


Notice: before going further, you should know that if you will remove a user from Syncope it will be removed from external resource too, so if you don't want it to happen you should override capabilities in MySQL1 by editing it.

Select MySQL2, click "Edit provision rules", then the "+" button:


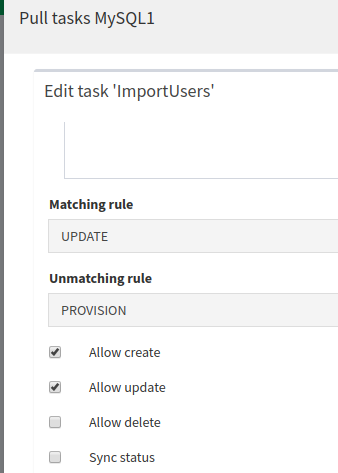
Select MySQL1 and choose "Pull Tasks" from menu, click the "+" button:
Fill the fields as below, notice that the last step tells Syncope to run the task every day at 12pm, but you can change it as you prefer and it is not mandatory schedule it.


After saving it, click on the created "ImportUsers" task and select "Run", now click on the gear icon to run it.
You can see the result of the task by entering the "View" section from toggle menu.
Now the 2 users that you have in the MySQL1 resource are stored in Syncope:

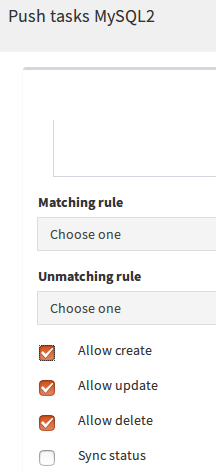
As in Step 10, select MySQL2 and choose "Push Tasks" from menu, click the "+" button:
Fill the fields as below:


Now execute the task, as you did for the "ImportUsers" task, and check in your MySQL2 instance that data is synchronized:

Go to Topology, select MySQL1 and choose "Pull Tasks" from menu.
Click on the previously created task and choose "template", then select "USER" and go on.
Find the "External resources" step in wizard and edit like this:

Now, if you have already executed the previous push task for MySQL2, access
the external resource and remove the rows from it.
Also it could be necessary to remove all previously synchronized users from
Syncope too, then run the "ImportUsers" pull task from MySQL1 resource.
All users will be pulled to Syncope again and propagated to MySQL2 resource. The result should be something like this:

Notice: this way the "fullname" attribute will be correctly populated.


